Exposed All-Thread Rod in MEP Zones: A Contractor's Guide to General Duty Clause Compliance
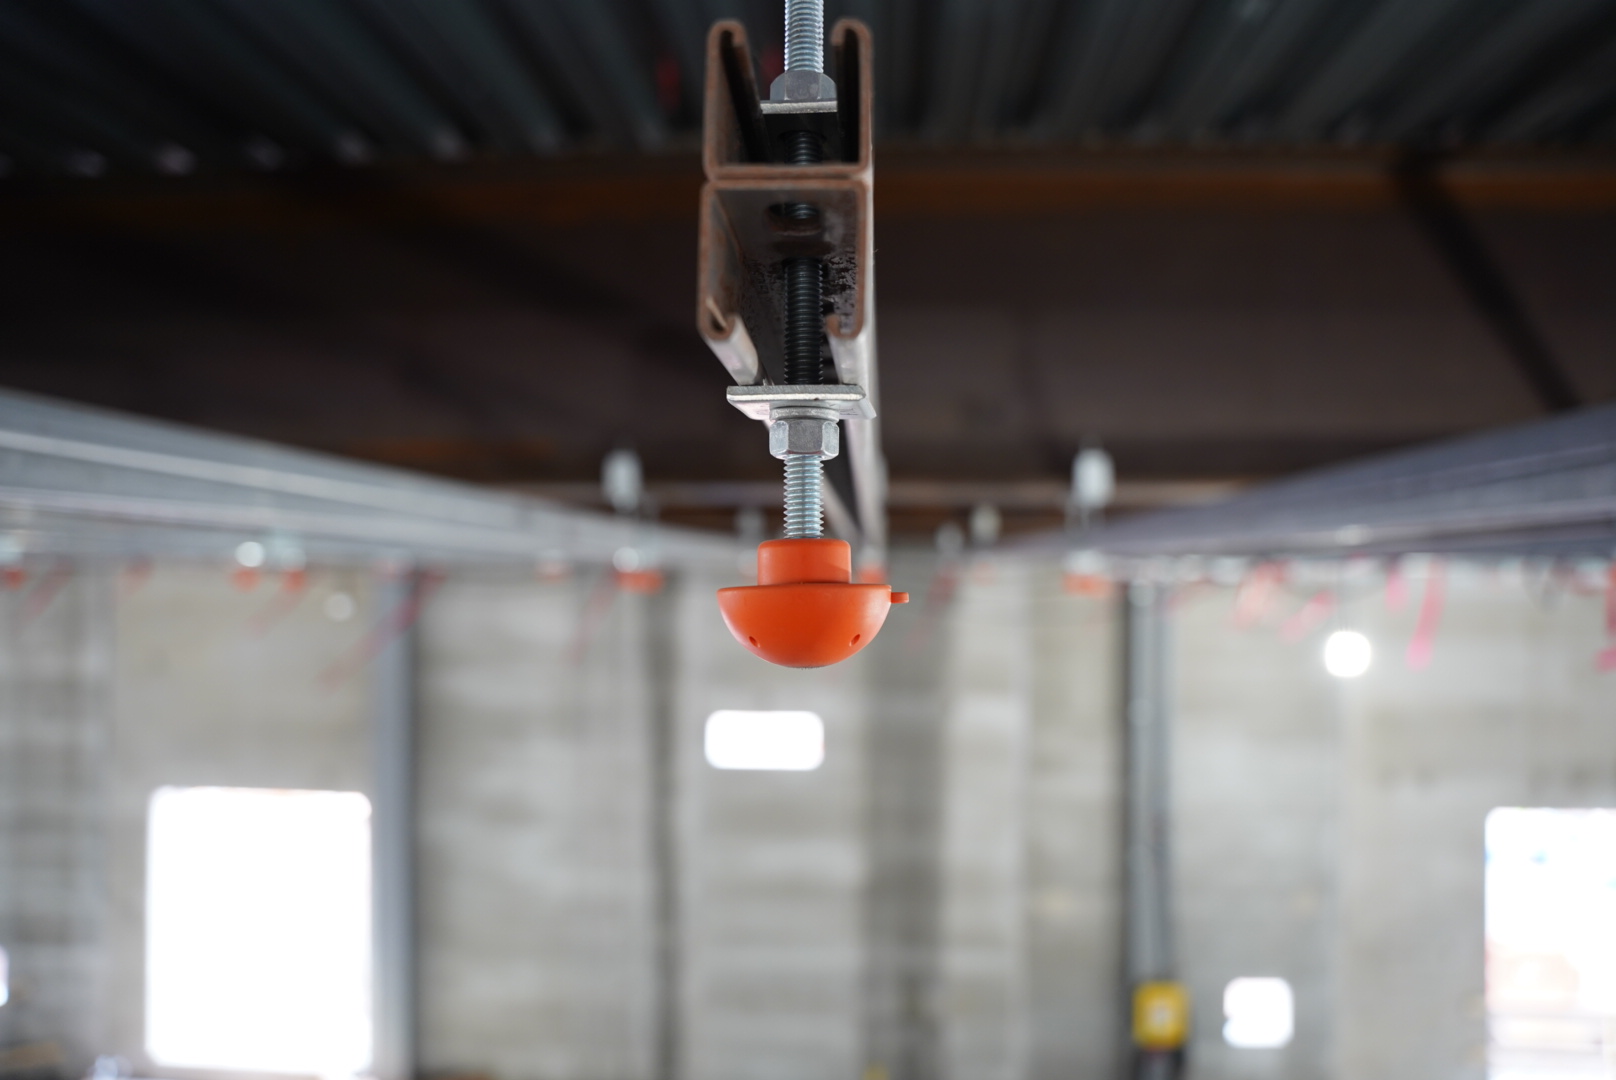
Exposed All-Thread Rod in MEP Zones: A Contractor's Guide to General Duty Clause Compliance
OSHA's General Duty Clause Section 5(a)(1) requires employers to furnish workplaces free from recognized hazards. For MEP contractors, exposed threaded rod ends create a clear, documented hazard. Sharp, protruding threaded rod causes lacerations and puncture wounds that OSHA citations cite with regularity. The difference between a compliant job site and a violation notice often comes down to one decision: whether you've taken documented action to eliminate the hazard.
This article covers the practical steps MEP contractors and construction safety managers use to address threaded rod hazards before inspectors arrive.
Identify All-Thread Rod in Your MEP Work
Start with a site walk. HVAC rough-ins, plumbing supports, and electrical conduit hangers all rely on threaded rod. Once concrete sets or framing closes, these rods remain exposed during construction phases when workers move through the space frequently.
Create a hazard map specific to each project phase. Note rod locations, diameters, and heights. Document which workers pass through these zones and how often. This simple inventory becomes your defense against a citation. OSHA inspectors expect contractors to identify their own hazards before regulators do.
Assess Worker Exposure During Active Phases
Every exposed rod end presents a laceration and puncture risk, regardless of height. Overhead rods catch workers reaching, ducking, or moving material through tight mechanical spaces. Rods at chest height in a crowded mechanical room create a different but equally serious risk profile.
Score exposure by frequency and proximity, not by height alone. If workers regularly work near or beneath the rod, the hazard is active and requires immediate control. If the rod sits in a sealed-off zone, risk is lower but still documentable. Your assessment should reflect reality, not wishful thinking. Inspectors look for evidence that you considered actual work patterns, not theoretical ones.
Select Hazard Controls That Fit Your Project
OSHA's hierarchy of controls provides the framework inspectors expect contractors to follow. In practice, threaded rod supports cable trays, pipe, and ductwork, so removing it outright is rarely on the table. Most MEP contractors focus their effort on engineering controls: capping, covering, or shielding exposed ends so workers cannot contact sharp points.
This is where MagGuard® magnetic safety caps fit. Caps install in seconds, require no tools, and stay in place through multiple trades passing through the space. Many contractors pair capping with basic administrative steps, like signage in high-traffic zones or a reminder in the toolbox talk, but the cap itself is what satisfies the General Duty Clause on a documented hazard like this one.
Document Your Control Implementation
This step separates compliant contractors from citations. OSHA investigators look for evidence that you identified the hazard and took deliberate action.
Photograph the control in place. If you install caps on threaded rods, take photos from multiple angles. If you install protective shrouding, document it before drywall covers the work. Create a written record noting the date, location, rod size, and control type applied.
Assign responsibility. Name the person or crew responsible for installing and maintaining controls. On larger projects, include this requirement in the safety briefing and toolbox talks. When workers understand that rod capping is a required task, not optional, compliance improves.
Review controls during weekly safety inspections. Magnetic caps sometimes dislodge during subsequent trade activity. Catches in electrical conduit can pop caps off. Inspect the space and reinstall caps that shifted. This ongoing maintenance demonstrates active hazard management to any inspector walking the site.
Install Controls Before OSHA Arrives
Timing matters. Install caps and covers during the MEP rough-in phase, not during final inspection. If an inspector finds exposed threaded rod before your controls are in place, you've documented the hazard without documented controls to match. That creates citation risk.
For MagGuard® caps, this timeline works simply. Available in four sizes covering 1/4" through 7/8" rod diameters, they fit standard all-thread without modification. Installers place them by hand in seconds, with no tools or fabrication required. Six color options help you organize by area or system.
Because installation takes seconds per cap, MEP crews can fold rough-in capping into the existing schedule rather than treating it as a separate task. A crew member assigned to the job can move through a mechanical room or hallway run and clear the exposed ends before the next trade moves in.
Create a Paper Trail for Your Defense
OSHA investigators often work backward from an incident. A worker gets punctured by a threaded rod, and the investigation begins. Your documentation becomes your defense.
Maintain a file with:
- Site photos showing control installation
- Work orders confirming when controls were installed
- Safety briefing records noting hazard discussion
- Weekly inspection logs showing controls remained in place
- Maintenance records if any controls required replacement
If an inspector arrives without an incident, your documentation still matters. It shows you understand OSHA compliance and take it seriously.
Action Steps for Your Next Project
Before mobilization, walk the plans with your safety manager and identify the areas where threaded rod runs are dense: mechanical rooms, ceiling grids over corridors, riser shafts, and anywhere cable tray or pipe support is heavy. On projects with thousands of rod ends, treat this as a zone-by-zone plan rather than a rod-by-rod count. Estimate quantities by system type and area, then source the appropriate mix of cap sizes based on the rod diameters your MEP drawings specify.
Assign capping responsibility to a specific crew member or supervisor for each zone, and build it into the rough-in sequence so it happens as work progresses rather than as a separate pass at the end.
On site, install controls during rough-in. Photograph the completed work by zone. Add the hazard and control to your safety inspection checklist. Reinspect weekly. Keep records organized and accessible.
---
Ready to protect your MEP crews and your project record? MagGuard® magnetic safety caps eliminate threaded rod hazards in seconds. Four sizes cover all standard all-thread diameters. Made in USA. Order samples or learn more at prostruxsolutions.com, or email bwillems@prostruxsolutions.com to discuss your next project's requirements.
Related Articles
6 min read
MagGuard® vs. Traditional Threaded Rod Caps: Understanding the Difference
Traditional threaded rod caps and MagGuard® are not the same product solving the same problem. Here is how they differ, and how to decide which is right for your application.
4 min read
Threaded Rod Safety Caps: Mitigating Overhead Hazards on Commercial Jobsites
During the rough-in phase of commercial construction, hundreds of all-thread rods hang vertically from ceilings to suspend critical mechanical, electrical, and
Stay Ahead
Job Site Safety Updates
Stay ahead of job site safety. Get updates from ProStrux — new resources, product news, and compliance insights, straight to your inbox.
MagGuard®
Ready to protect your crew?
MagGuard® installs in seconds with no tools. Available in four sizes and six colors for any MEP application.